Februar 27, 2012
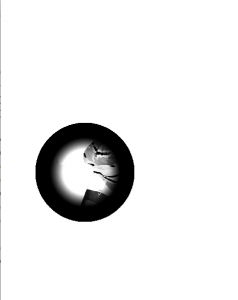
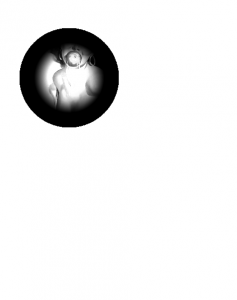
Für unseren Custom Image Filter, lernten wir, wie mit Hilfe von Processing die Pixel aus einem Bild ausgelesen weren und danach die Werte geändert werden. So konnten wir eigen photoshopartige filter erstellten mit denen das Bild manipuliert werden kann. Hier entsteht ein Guckloch, mit dem man das Bild erforschen kann. Durch das Klicken der Maus wird das Bild farbig angezeigt.

PImage img;
int m = 1;
String[] pics = {
"elv1.jpg", "elv2.jpg", "elv3.jpg"
};
void setup() {
size(478, 600);
img = loadImage(pics[0]);
}
void draw() {
if (keyPressed) {
if (key == 'd') {
if (m <3) {
img = loadImage(pics[m]);
m++;
}
else {
m = 0;
}
}
}
loadPixels();
// We must also call loadPixels() on the PImage since we are going to read its pixels. img.loadPixels();
for (int x = 0; x < img.width; x++ ) {
for (int y = 0; y < img.height; y++ ) {
// Calculate the 1D pixel location
int loc = x + y*img.width;
// Get the R,G,B values from image
float r = red (img.pixels[loc]);
float g = green (img.pixels[loc]);
float b = blue (img.pixels[loc]);
// We calculate a multiplier ranging from 0.0 to 8.0 based on mouseX position.
// That multiplier changes the RGB value of each pixel.
float distance = dist(x, y, mouseX, mouseY);
float adjustBrightness = ((float) mouseX / 2000 ) * 5.0;
float distance2 = dist(x, y, mouseX, mouseY);
r *= adjustBrightness;
g *= adjustBrightness;
b *= adjustBrightness;
float adjustBrightness2 = (100-distance)/20;
r *= adjustBrightness2;
g *= adjustBrightness2;
b *= adjustBrightness2;
float raster = (70-distance2)/20;
r *= raster;
g *= raster;
b *= raster;
// The RGB values are constrained between 0 and 255 before being set as a new color.
r = constrain(r, 0, 255);
g = constrain(g, 0, 255);
b = constrain(b, 0, 255);
if (distance2 >= 99) {
r = 255;
b = 255;
g = 255;
}
// Make a new color and set pixel in the window
color c = color(r, g, b);
pixels[loc] = c;
}
}
updatePixels();
if (!mousePressed) {
filter(GRAY);
}
}