12. January 2015
Authors:Elio Haas, Nadja Müller, Lea Planzer, Armanda Weibel Process: (Digital/ Material-based) 1. Research During our research on the first day, we melted lots of different materials as we wanted to find out, how the materials react to the different thermal properties. Equipped with a camera we started melting ice, marshmallows, soap, snow, cheese, wax, sugar, yoghurt cups and so on with hot air gun, a mini cooker or candles… For things we wanted to melt but we couldnt find or buy, we did some researches on the internet. We realized, that in our daily routine, we are using lots of things which are melted or had to be melted together with another material without even being aware of it. Even though we gained a lot of knowledge from our researches it was a bit frustrating to see, that the usual result after melting without channeling a material always was a glob or a puddle. Thats why we decided to continue working with sugar as it was a material which could be melted in different phases and also got interesting structures and shapes. For example, sugar with cold water produced a solid and granular mass, keeping it longer on the cooker it changed into a dry and crumbly consistency, when the heat reached its maximum the molasses turned into liquid caramel. So the hoter it was, the darker it got. Different ways of Melting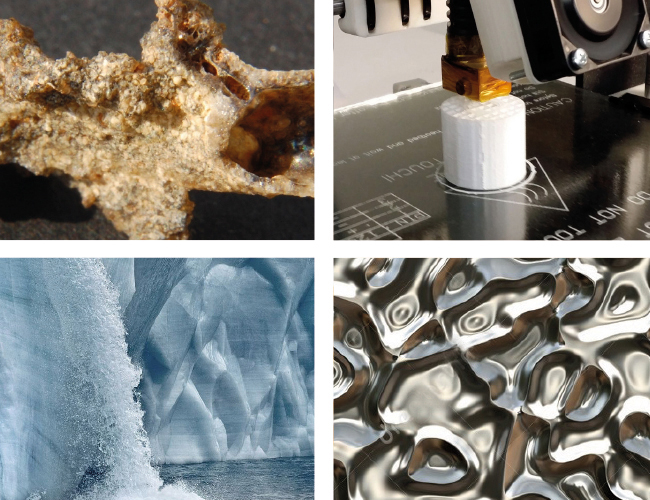 Material which modifies its shape continuously
 2. Combination of molasse & styrofoam
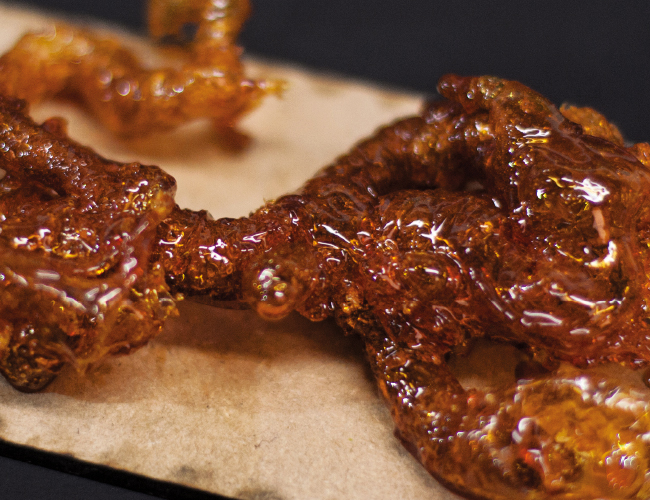
After experimenting with different melting phases, we wanted to find out, how different materials would react to the hot caramel molasse and if or how it would melt together. Espcecially the combination of the hot caramel molasse and the styrofoam, produced a interesting shape. The tunnel which was build through pouring the hot caramel molasse over styrofoam got really interesting and special texture.
First experiments with hot caramel molasse & styrofoam
2. Combination of molasse & styrofoam
After experimenting with different melting phases, we wanted to find out, how different materials would react to the hot caramel molasse and if or how it would melt together. Espcecially the combination of the hot caramel molasse and the styrofoam, produced a interesting shape. The tunnel which was build through pouring the hot caramel molasse over styrofoam got really interesting and special texture.
First experiments with hot caramel molasse & styrofoam
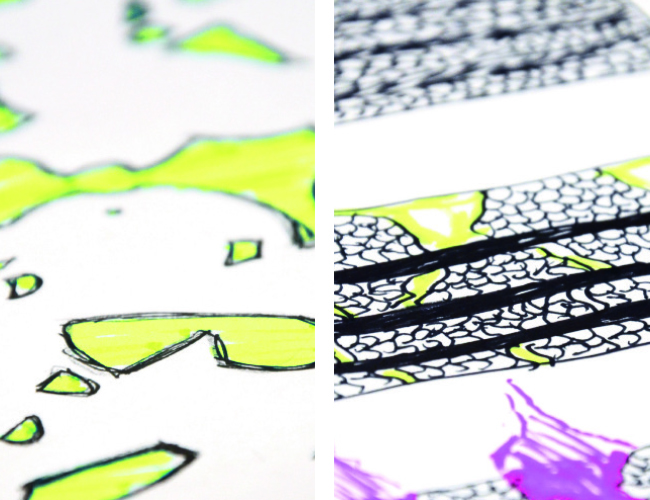
 3. First Ideas & Sketches
Sketches of different layers
3. First Ideas & Sketches
Sketches of different layers
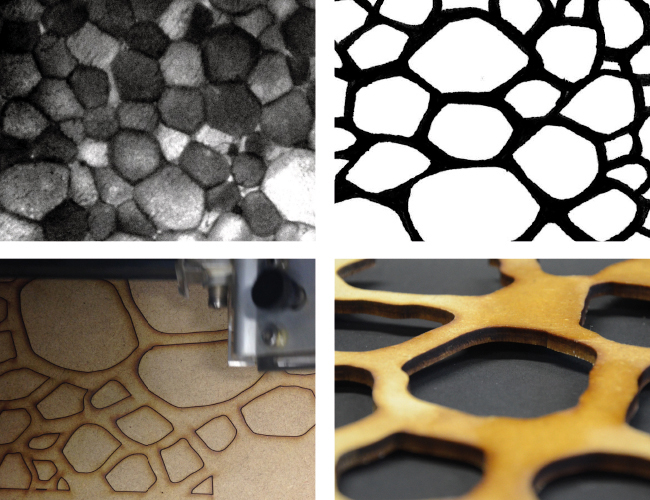
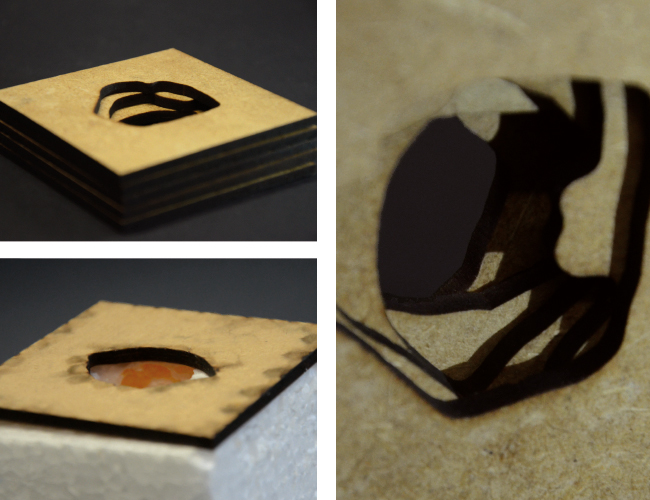
 Inspired by these results, we started working intensively with these two materials. Our idea was, to create a game, where the players could use these tunnels. In a further step we analysed the cells and the structure of an extremely thin slice of styrofoam on a light table. We took pictures of it and traced it after editing it in the Photoshop in the Illustrator with the pathfinder. The pattern we got looked simliar to a honeycomb pattern and served as the basis of the tunnels we wanted to melt. In a next step we used the lasercutter to reproduce these cells which were digitized with Illustrator on MDF panels. To make sure we didnt lose to much of the caramel molasse we also had to create a box were the melting process would take place. We placed several layers of the styrofoam in the box to allow the caramel molasse melting through the whole styrofoam.
Styrofoam Structure & First Trials
Inspired by these results, we started working intensively with these two materials. Our idea was, to create a game, where the players could use these tunnels. In a further step we analysed the cells and the structure of an extremely thin slice of styrofoam on a light table. We took pictures of it and traced it after editing it in the Photoshop in the Illustrator with the pathfinder. The pattern we got looked simliar to a honeycomb pattern and served as the basis of the tunnels we wanted to melt. In a next step we used the lasercutter to reproduce these cells which were digitized with Illustrator on MDF panels. To make sure we didnt lose to much of the caramel molasse we also had to create a box were the melting process would take place. We placed several layers of the styrofoam in the box to allow the caramel molasse melting through the whole styrofoam.
Styrofoam Structure & First Trials
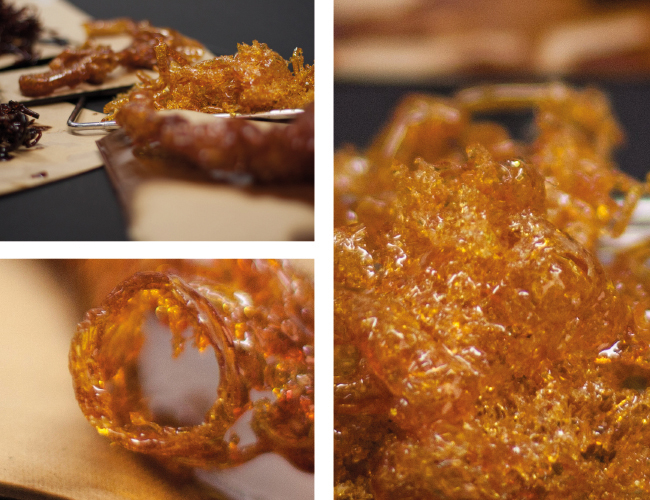
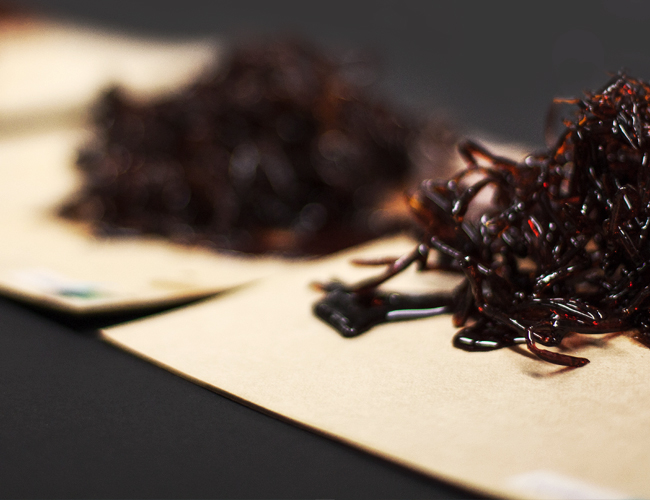
 Hot molasse & styrofoam melted
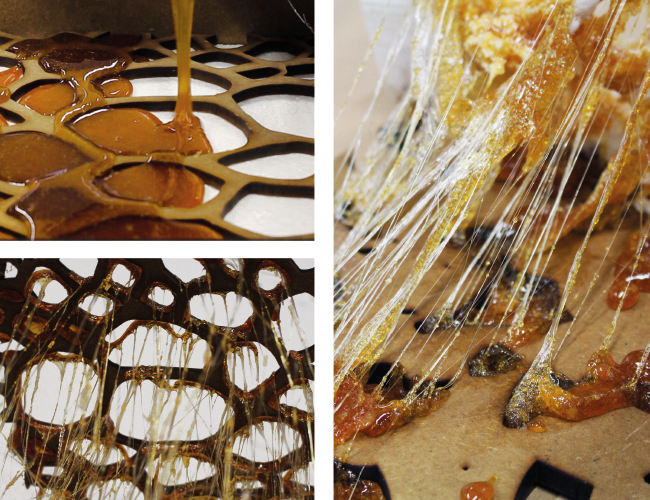
 Before we started the experiment, we thought the result would be that we will get different tunnels with interesting branches. Unfortunately we were disappointed. The cells of the styrofoam we’re placed to close to each other, this was one problem. Another problem was, that hot caramel molasse flowed through the tunnels, but it didn’t stay in these. So the whole caramel concentrated at the bottom of the box and melted the deepest layer of the styrofoam.
That’s why we decided to do separate forms for each tunnel. For that we had to cut individual cells with the laser cutter.
With these MDF panels we tried again to create separate tunnels which worked perfectly.
Before we started the experiment, we thought the result would be that we will get different tunnels with interesting branches. Unfortunately we were disappointed. The cells of the styrofoam we’re placed to close to each other, this was one problem. Another problem was, that hot caramel molasse flowed through the tunnels, but it didn’t stay in these. So the whole caramel concentrated at the bottom of the box and melted the deepest layer of the styrofoam.
That’s why we decided to do separate forms for each tunnel. For that we had to cut individual cells with the laser cutter.
With these MDF panels we tried again to create separate tunnels which worked perfectly.
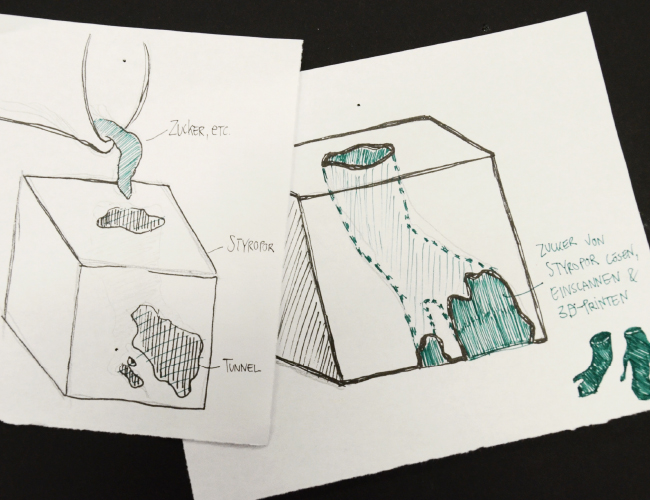
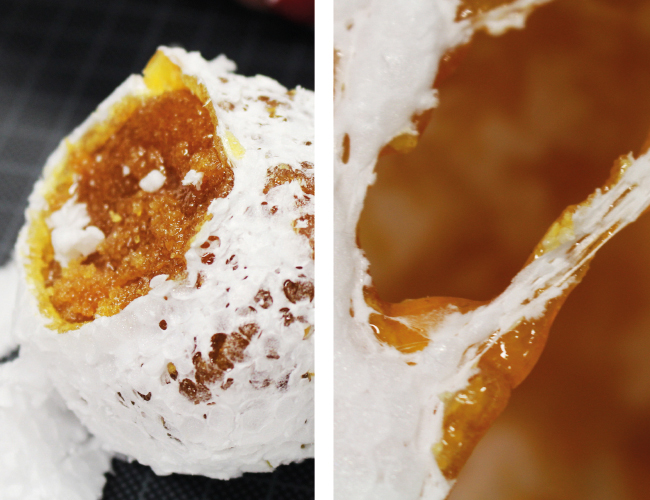
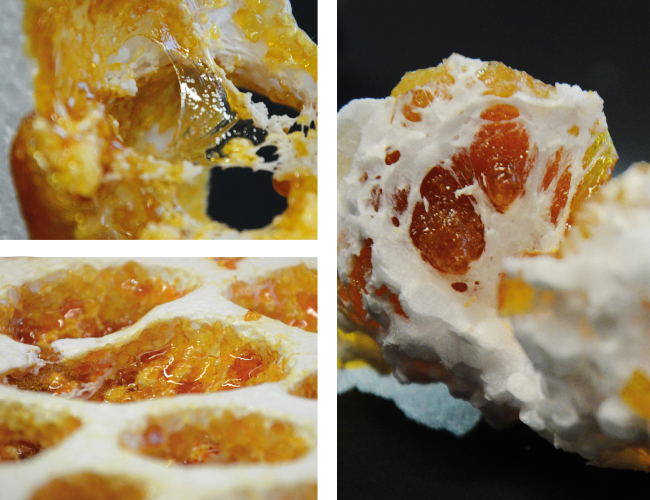
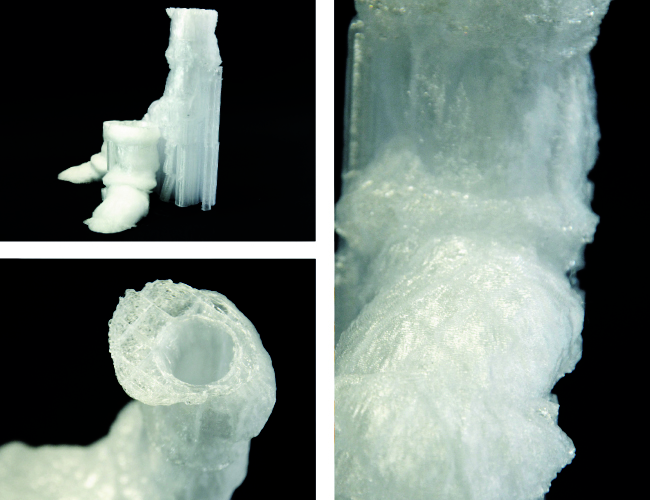
 After allowing the material to dry overnight, we filled the tunnels with less hot molasse to make sure the styrofoam wouldn't melt again. We liked the fact, that we were able to keep the original melted texture. Thats why we wanted to reproduce this combination again, so that the user could witness and comprehend all this in an enthralling way. Based on our knowledge gained in our researches we decided to use Ice, which could be melted within the hands of the players. Due to the fact, that the molasse dissolve themselves while the water runs through the tunnels, we decided to conserve them with the Photo-Scanner, so that we had been able to print them out with the 3D-printer.
Due to the entirely digital processing with Rhino we are able to make a totally new constructions of our tunnels and to print them with the 3D Printers. After having printed all these tunnels we had quite a lot of material. A discussion with Verena and Clemens led us to the conclusion that we had been too much focused on the game. In addition, the results didnt really meet our aesthetic expectations.
After allowing the material to dry overnight, we filled the tunnels with less hot molasse to make sure the styrofoam wouldn't melt again. We liked the fact, that we were able to keep the original melted texture. Thats why we wanted to reproduce this combination again, so that the user could witness and comprehend all this in an enthralling way. Based on our knowledge gained in our researches we decided to use Ice, which could be melted within the hands of the players. Due to the fact, that the molasse dissolve themselves while the water runs through the tunnels, we decided to conserve them with the Photo-Scanner, so that we had been able to print them out with the 3D-printer.
Due to the entirely digital processing with Rhino we are able to make a totally new constructions of our tunnels and to print them with the 3D Printers. After having printed all these tunnels we had quite a lot of material. A discussion with Verena and Clemens led us to the conclusion that we had been too much focused on the game. In addition, the results didnt really meet our aesthetic expectations.
With these insights, we tried to find a new purpose of use for the tunnels, but unfortunately it was preventing us from thinking in a new and „non-objectoriented“ way.
4 . Back to the roots
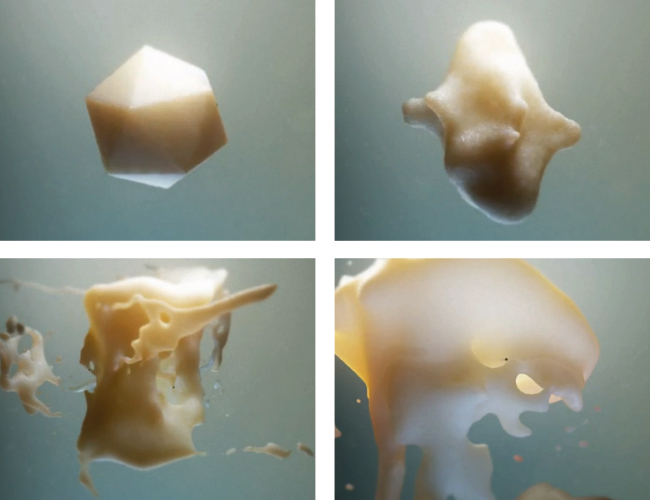
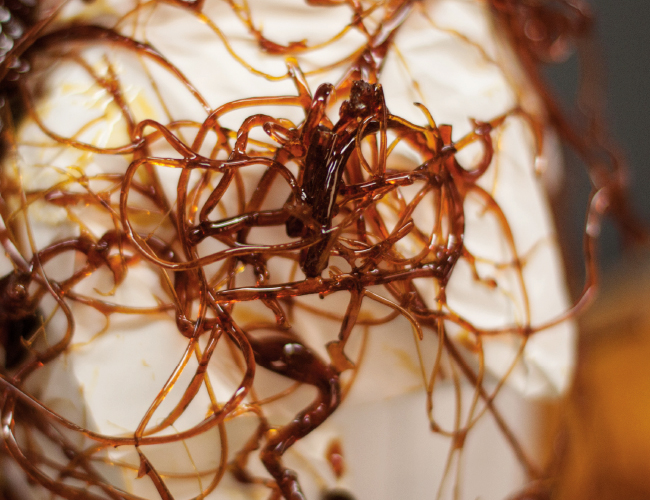
Then we realised, that we had to go back to the roots in order to approach the issue from another side. We startet to influence the melting processes with new methods. Soon we came upon the medium of water. So again, we started melting sugar with a bit of water, and poured it in the icecold water. Glossy and highly reflective surfaces fascinated and inspired us. As we knew from our researches and experiments from the beginning of the modul, that sugar sticks to the slightly wet skin, we wanted to use this insight as an advantage. Built on the findings of the study we had the idea to create a „wearable sugar-reflector“ which took the terms „moving and sweating“ into account. We thought about different ways how sweat could be produced as sport, stress, sun and so on. Later on we wanted to find out which parts of the body would be most suitable for the sugar-reflectors. However, we had to watch out not going back to the objectoriented-thinking.
For that reason, we first started with different water movements to creat these movement patterns made of sugar.
Experimental water movement
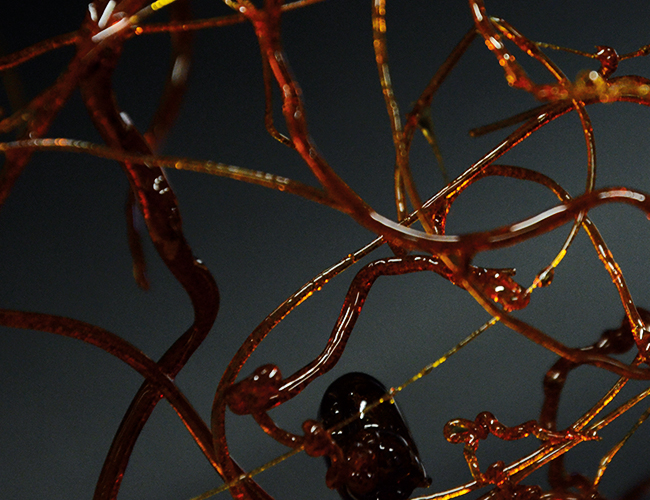
 So we tried to adapt „moving“ to the water. We had an aquarium filled with cold water. In this we created the following movements and poured the hot caramel molasse into. The chosen movements were rotating, pounding, walking and no movement. We always poured the caramel in a straight way into the water, only the movement made the difference. „Rotating“ was imitate with a food processor, „pounding“ with the flat hand and „walking“ with a piece of wood.
We excepted that we will get different forms through these actions, but there wasn’t really a difference. So in the next step we took our hand under the water that the almost cooled caramel enclose it. This worked very well and we received a nice shape around the hand. Through these ways we recognized that the speed, the heat and the quantity have a big influence to the structure of the figure. The flow of the hot caramel molasse also has an impact to the result.
5. Results
At the end of this process we received a lot of fragile structures, that looks a little bit like a caramel molasse 3D-print, which is hard to regulate. These are also highly reflective and it would be great to find a way to conserve them.
So we tried to adapt „moving“ to the water. We had an aquarium filled with cold water. In this we created the following movements and poured the hot caramel molasse into. The chosen movements were rotating, pounding, walking and no movement. We always poured the caramel in a straight way into the water, only the movement made the difference. „Rotating“ was imitate with a food processor, „pounding“ with the flat hand and „walking“ with a piece of wood.
We excepted that we will get different forms through these actions, but there wasn’t really a difference. So in the next step we took our hand under the water that the almost cooled caramel enclose it. This worked very well and we received a nice shape around the hand. Through these ways we recognized that the speed, the heat and the quantity have a big influence to the structure of the figure. The flow of the hot caramel molasse also has an impact to the result.
5. Results
At the end of this process we received a lot of fragile structures, that looks a little bit like a caramel molasse 3D-print, which is hard to regulate. These are also highly reflective and it would be great to find a way to conserve them.

 6. Conclusion
We had a long way through a lot of experiments in this module. We did a lot of learnings and we think the biggest one is that melting can be in the end a lot more than only a shapeless structure. It was very interesting to combine the melting process (especially from sugar) with other materials. Sugar is very interesting material because it’s not the first material that comes to mind when you think of melting. And we also learned a lot about the digitalization with the 3D-Scan and the further converting through Rhino.
6. Conclusion
We had a long way through a lot of experiments in this module. We did a lot of learnings and we think the biggest one is that melting can be in the end a lot more than only a shapeless structure. It was very interesting to combine the melting process (especially from sugar) with other materials. Sugar is very interesting material because it’s not the first material that comes to mind when you think of melting. And we also learned a lot about the digitalization with the 3D-Scan and the further converting through Rhino.